Texturing
by Escodrion
I would like to present a short guide on texturing models. This is easier than you might think, but it can be extremely fiddly at times, so use extreme caution.
You will need:
- UTFEditor_1.4.exe
- Two different models
- ObjView.exe (Optional)
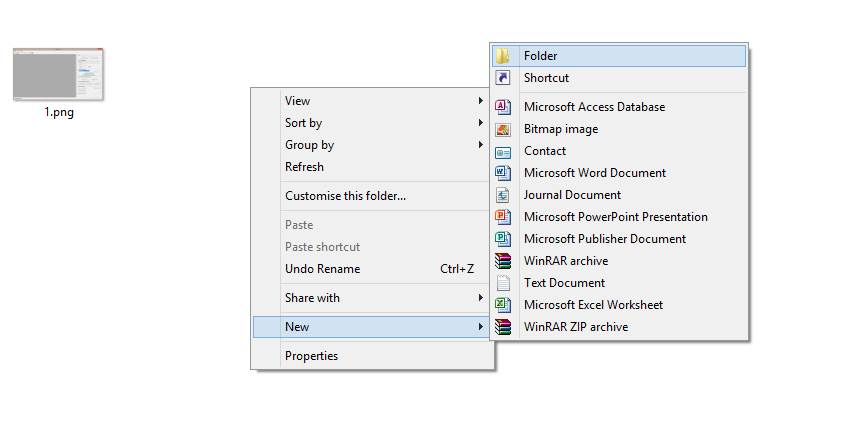
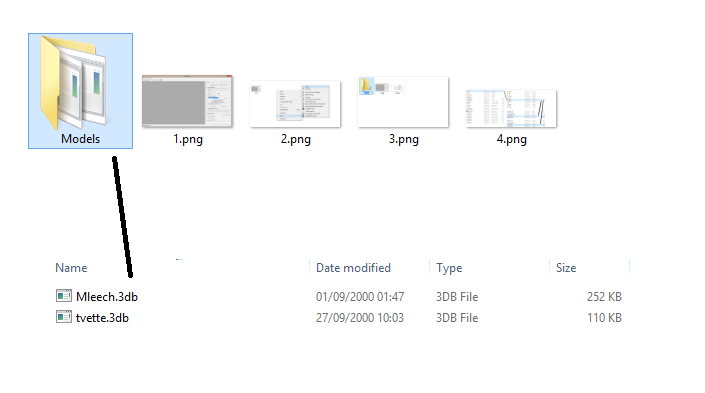
1. Let's start. Create a new folder somewhere and call it something like "Models".
|
|
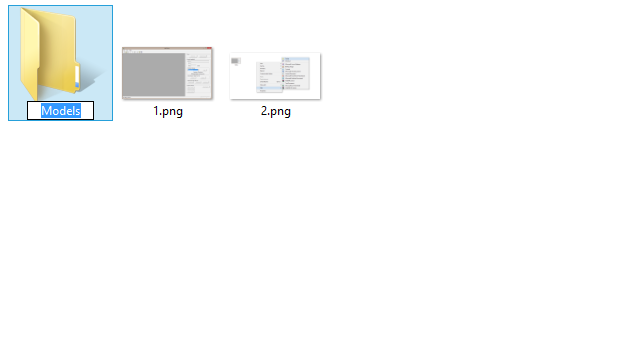
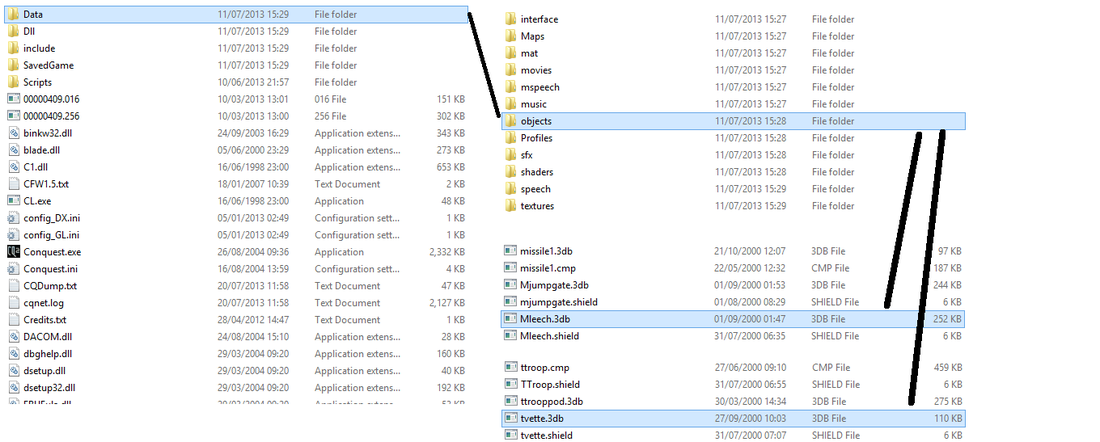
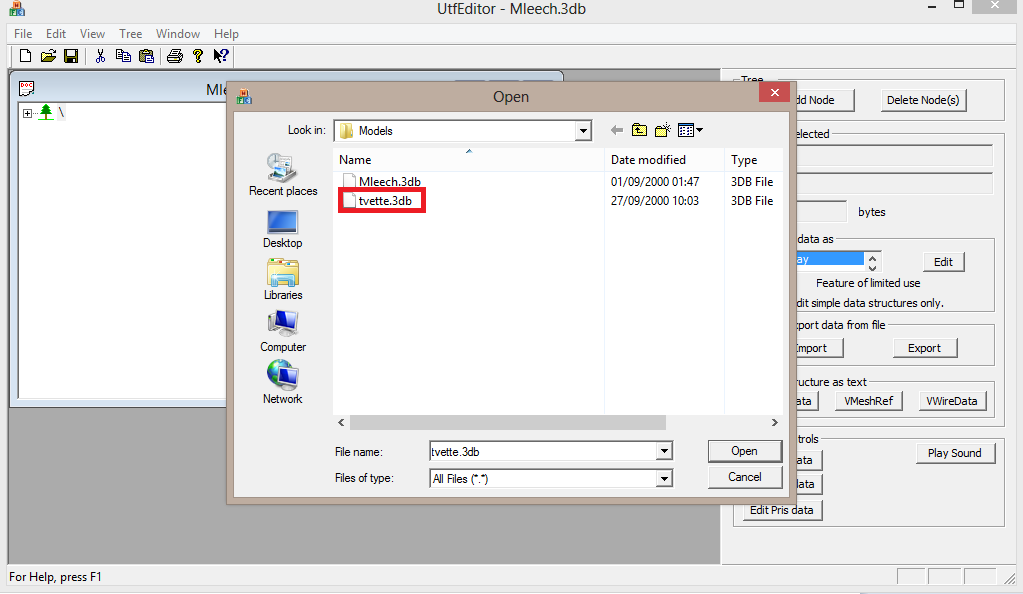
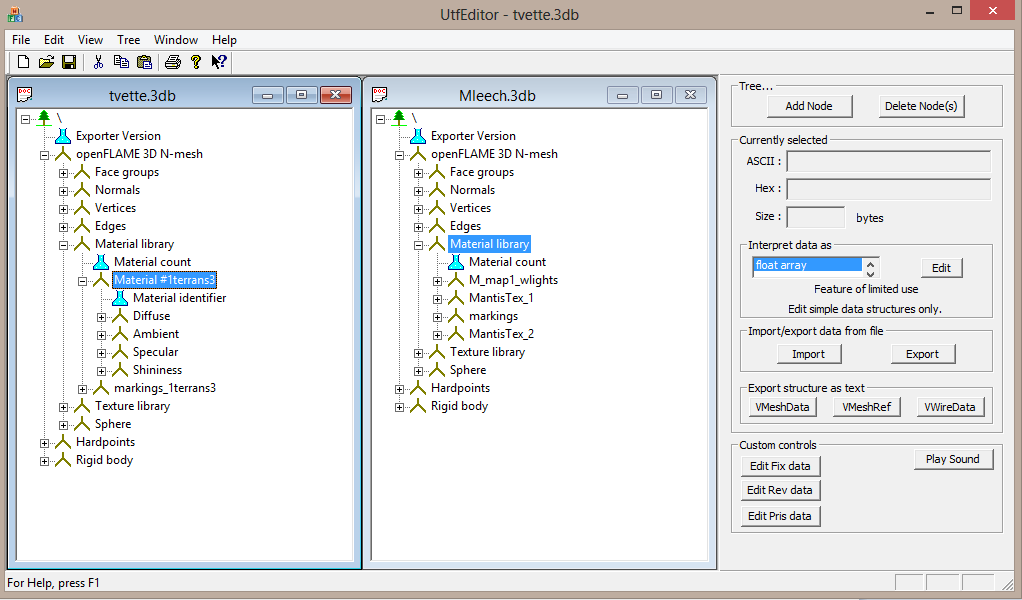
2. Go to the game folder and navigate to Data -> objects. Choose two objects, one you would like to change the texture of, and the other, the one you would like to take the texture from. I chose Mleech.3db (the Leech ingame) for the model and tvette.3db (Corvette ingame) for the texture, so basically I'm going to be re-texturing the Mantis ship to look like a Terran ship.
3. Copy the two files you selected to your "Models" folder.
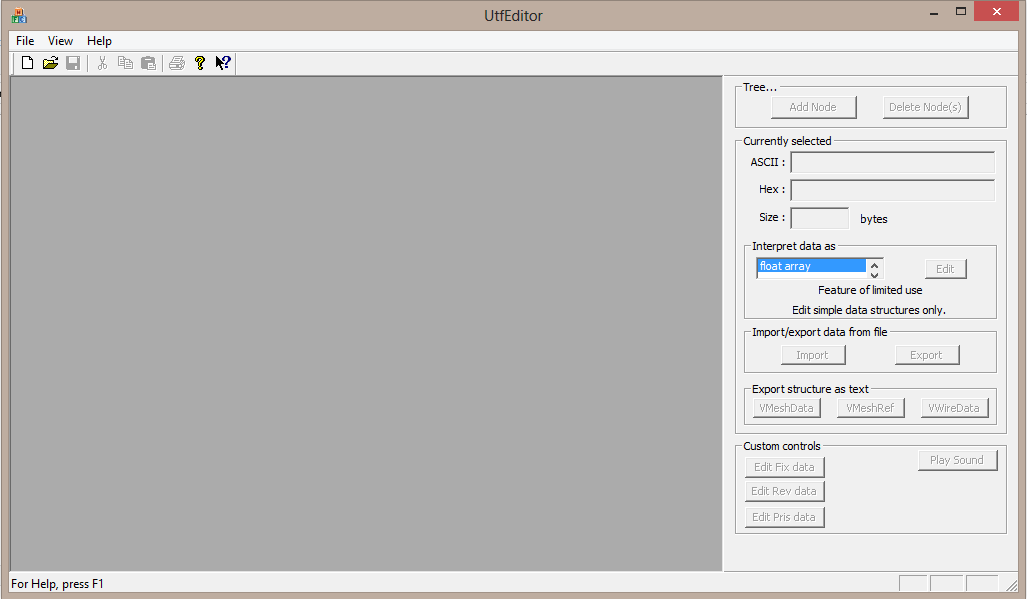
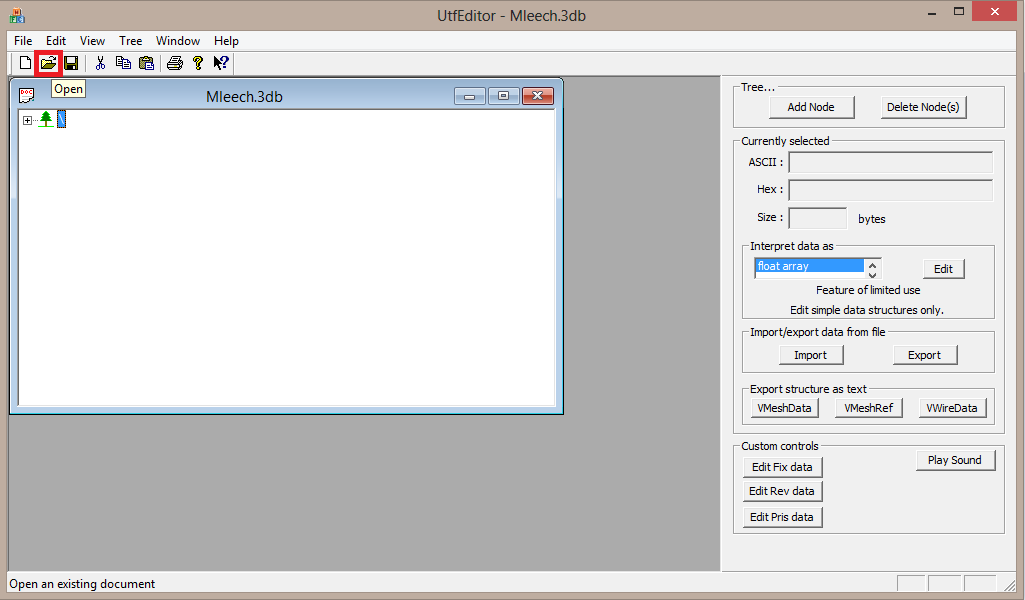
4. Open up UTF_Editor 1.4. You should see a window like this:
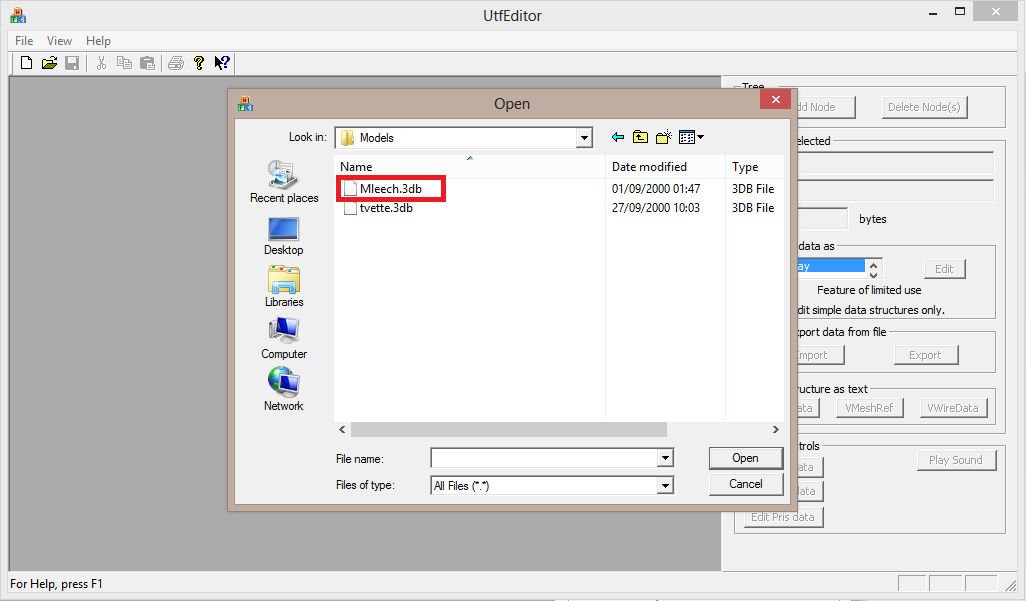
5. Open the two files you need for editing.
First the one you wish to change the texture of.
|
|
Then the one you want to take the texture from
|
|
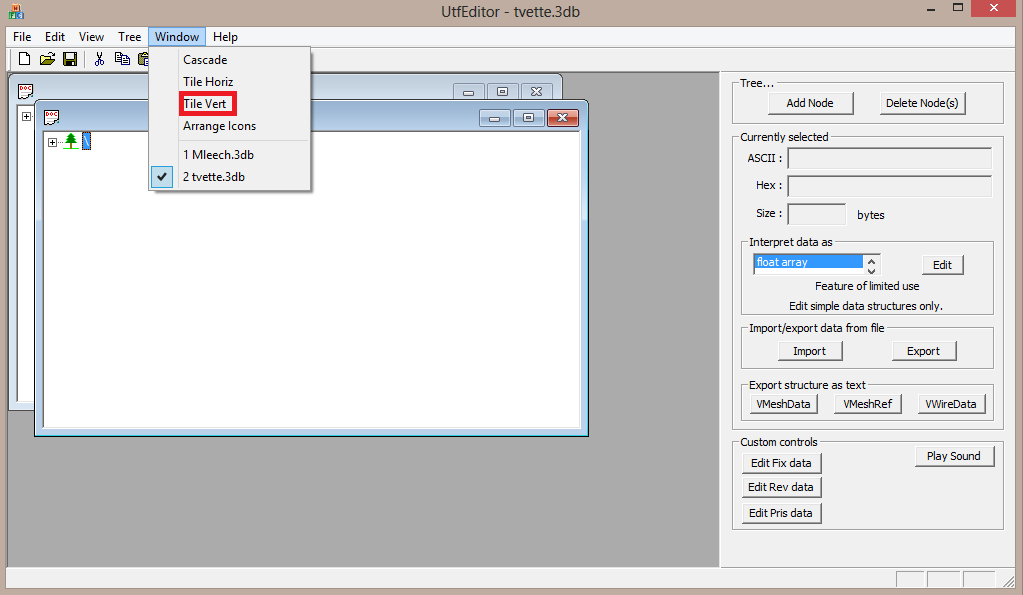
6. You should get them one on top of the other. A good trick is to arrange them so they are next to each other. There is a nice trick available for doing this.
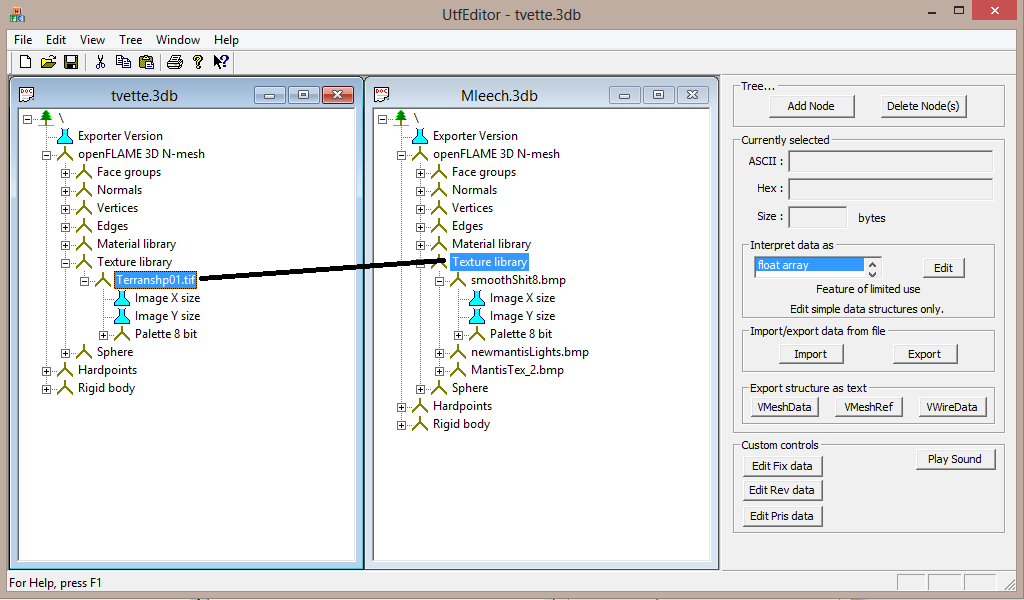
7. Expand the trees from both models by clicking the [+] icons on the left until you see the "Texture branches". Expand those and you will see the leaves and branches of the actual textures.
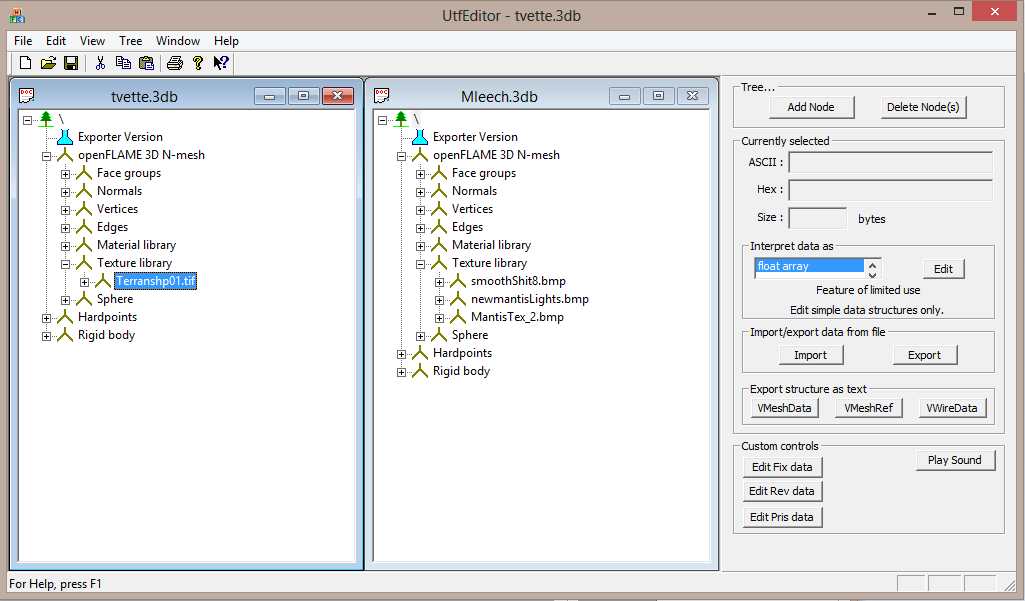
8. Drag and drop the "Terranshp.01.tif" branch from the tvette.3db model onto the "Texture library" branch from the Mleech.3db model.
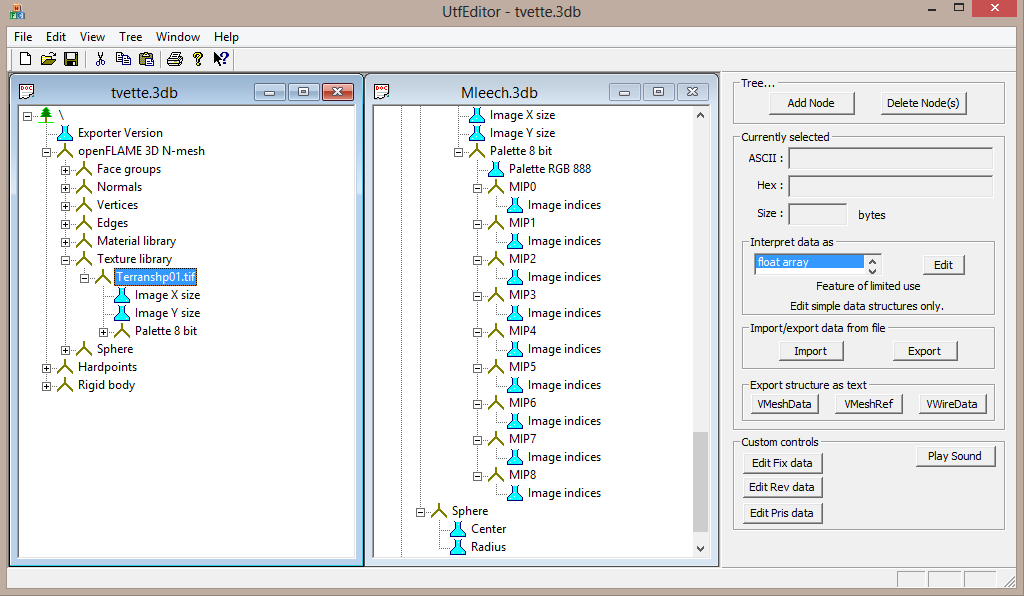
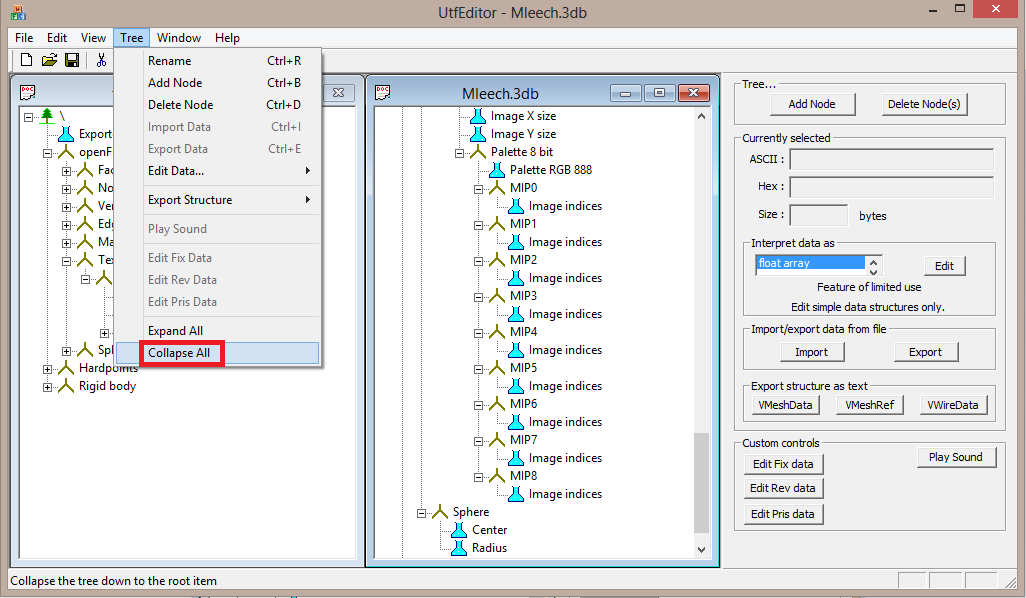
9. Now for the annoying part. As you should see all the nodes on the Mleech.3db model have expanded which looks a mess. This will happen every time you drag and drop something from one file to the other. There's a quick trick for making them all collapse back. Left click on the Mleech.3db window and then go to Tree -> Collapse all. Then navigate back to the textures folder and your texture should be sitting there at the bottom.
|
|
10. You might think that you've finished, but actually you are only about half way through the process. Collapse the "Texture library" branches on both models and expand the "Material library" branches on both models. You should get something like this.

11. Here comes the tricky part, so time for a little explanation. There are two types of materials: normal materials and markings, normal materials are the basic textures for any ship and markings are the parts of the ship that are coloured differently depending on the player's colour. You can see here that the tvette.3db model has two materials and the Mleech.3db model has four materials. It is very important to remember the order in which the materials on the model you want to change the texture of are, so for the Mleech.3db model they are:
- Material
- Material
- Markings
- Material
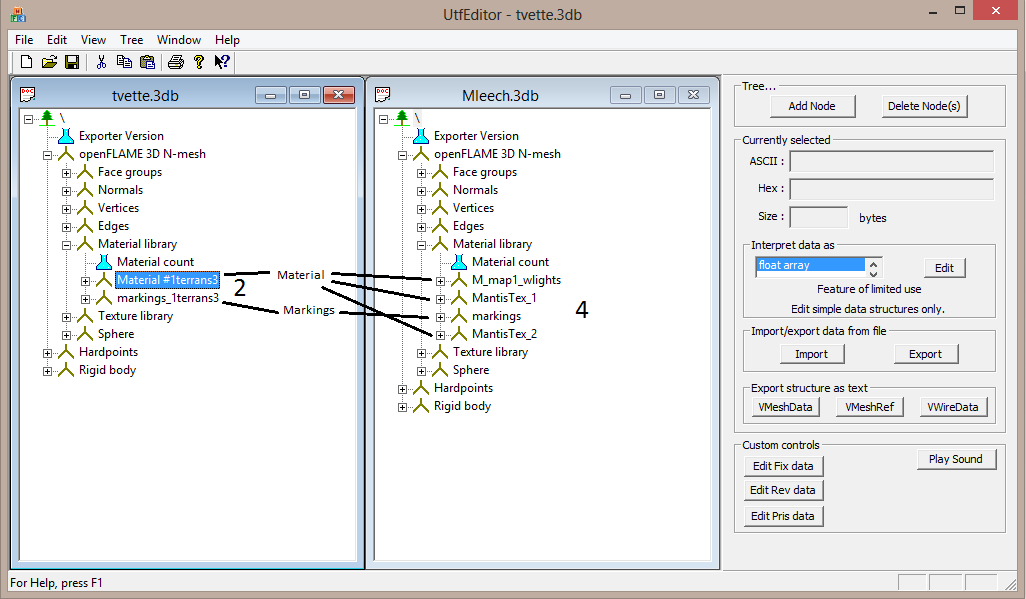
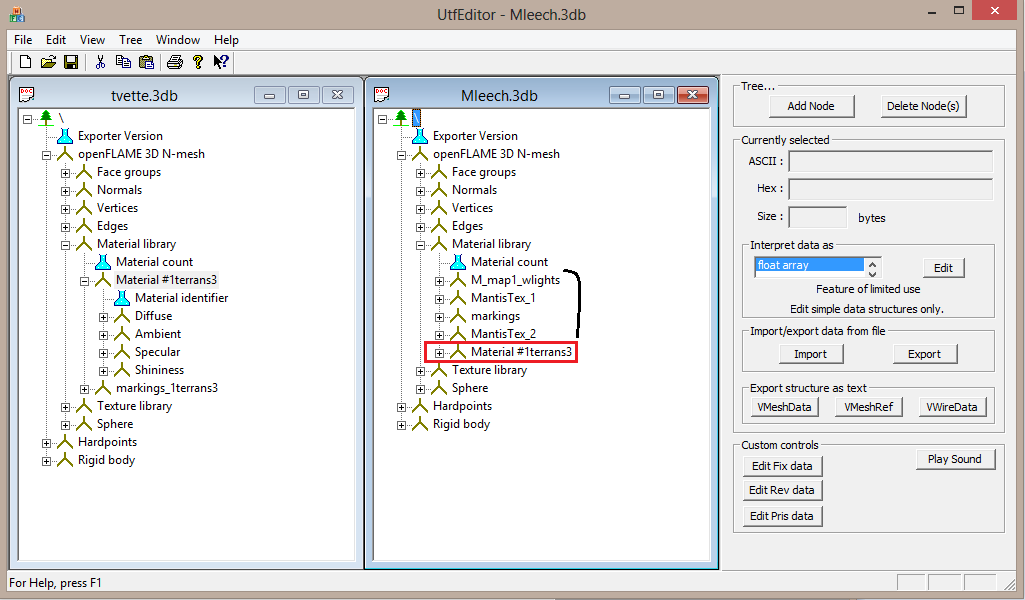
12. To start changing the materials drag and drop the "Material#1terrans3" branch onto the "Material library" branch. After collapsing the nodes and navigating back to the materials library, your new material should be sitting at the bottom of the "Material library" list.
13. Right now you want this material to be at the top of this list so delete the nodes that were there already by clicking on them and hitting the [Delete] key.
|
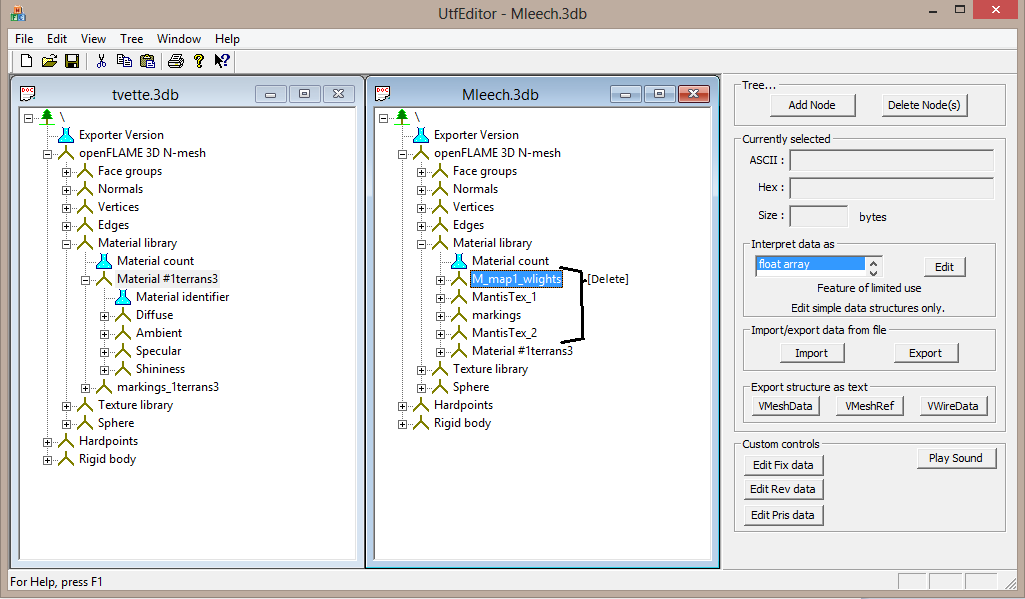
|
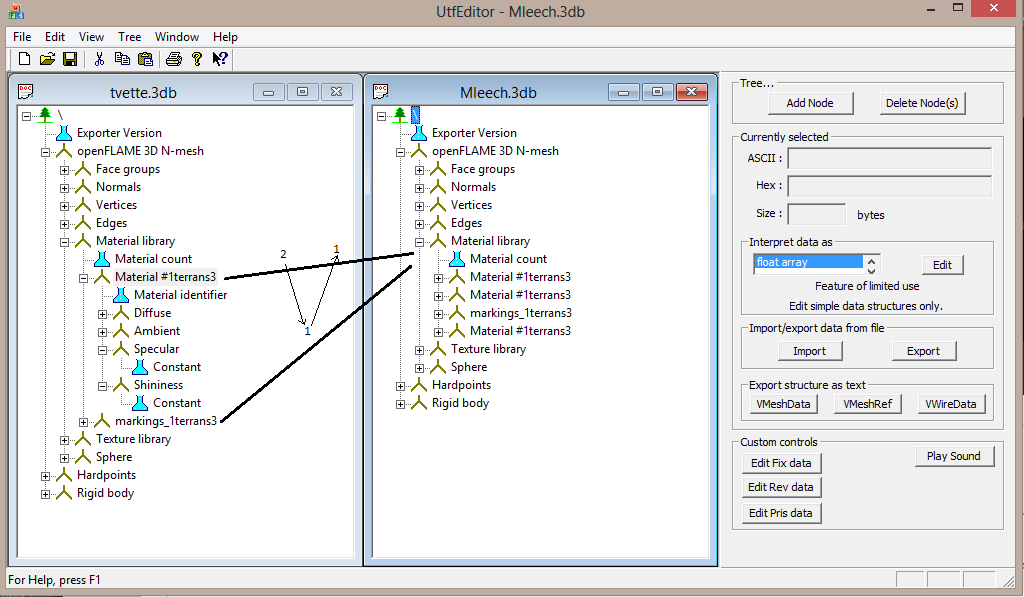
14. Drag the "Material#1terrans3" branch onto the "Material library" branch once more then drag the "markings_1terrans3" branch onto the "Material library" branch then drag the "Material#1terrans3" branch onto the "Material library" branch again (this is the order in which the materials were on the Mleech.3db model in the first place). If you did this correctly your "Material library" list should look like the one on the Mleech.3db model.
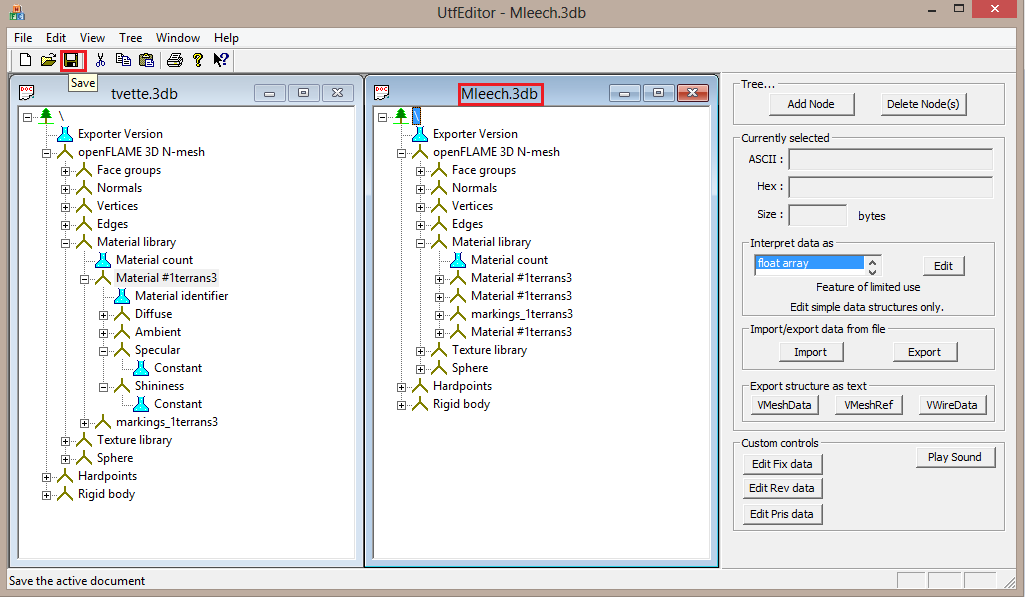
15. Now to save your model. Click on the Mleech.3db window then click the save icon.
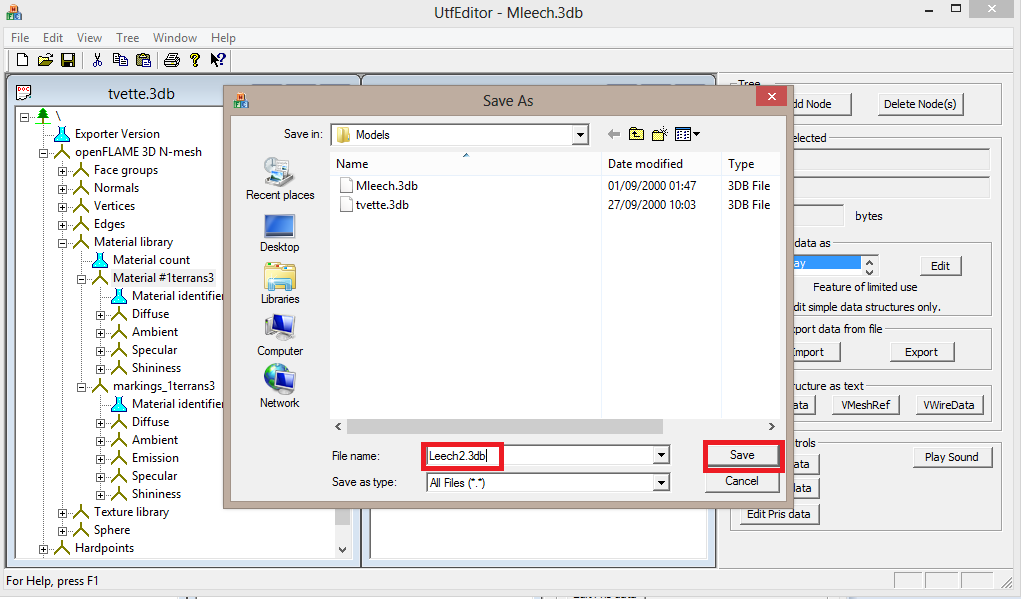
16. Change the name of your model (sometimes saving it with the same name doesn't work) and hit the save button. Do not forget to add the .3db at the end of your file name! You are now finished, but if you want to see your model, follow the next few steps.
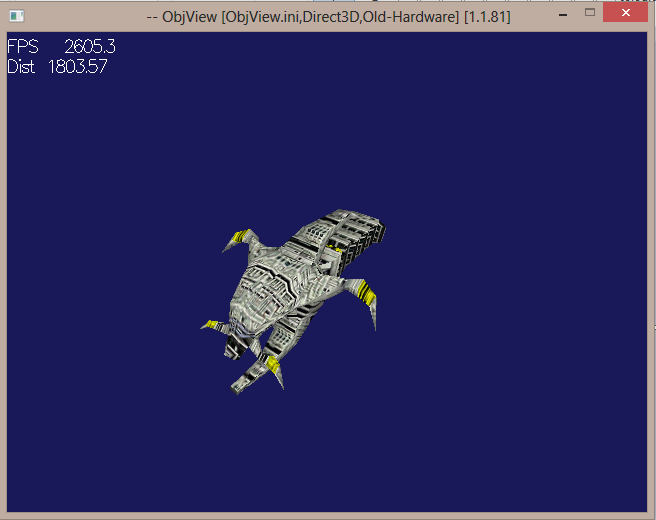
17. Open ObjView.exe and navigate to the folder you had your models in. Click on the file you want to view (in my case "Leech2.3db") and then hit the Open button.

18. If you followed all the steps correctly then your finished model should look something like this (navigate the position of the model with your arrow keys and the zoom by clicking [F] to zoom out and [SHIFT+F] to zoom out).